Bilder (Bitmaps)
Bilder laden, in Variable speichern und darstellen. (Achtung: "Sketch/Add File..." oder von Hand nach Sketch-Folder/data!)
size(800,480);
PImage hintergrundbild;
PImage bild;
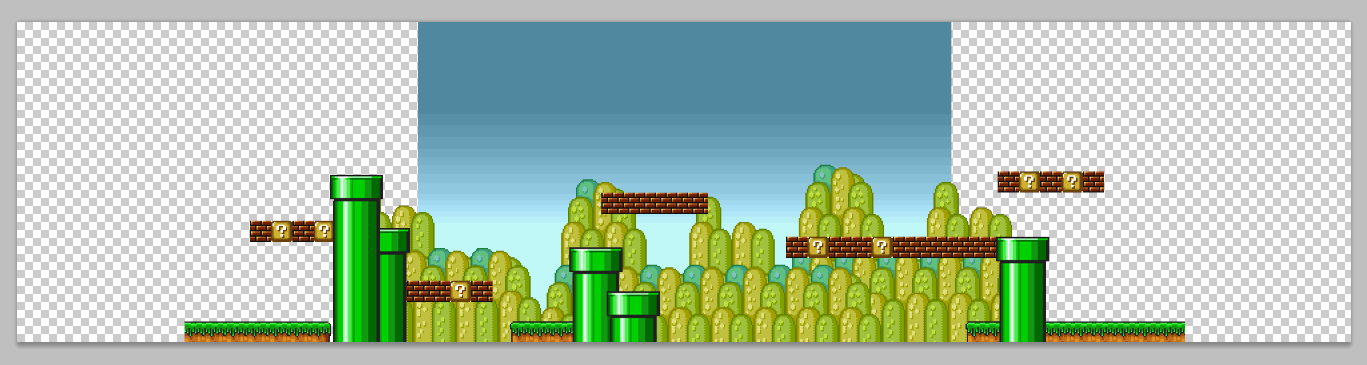
hintergrundbild = loadImage("back.gif");
bild = loadImage("luigi24.png");
background(hintergrundbild);
imageMode(CENTER);
image(bild,width/2,height/2);
↑
Bilder (Vektoren)
Vektordaten (SVG, z.B. aus Illustrator) mit PShape statt PImage, ansonsten bleibt alles ähnlich (aber: Skalierbarkeit!).
size(600,600);

PShape svgbild;
svgbild = loadShape("fade.svg");

background(255);
shapeMode(CENTER);
shape(svgbild, width/2, height/2, 800, 800);
shape(svgbild, width/2, height/2, 400, 400);
shape(svgbild, width/2, height/2, 200, 200);
shape(svgbild, width/2, height/2);
Anders als bei Pixelbildern, lassen sich bei vektorbasierten Bildern die Processing-Styles (fill, stroke) benutzen. Z.B.
size(600,600);

PShape svgbild;
svgbild = loadShape("fade.svg");

svgbild.disableStyle();

background(255);
shapeMode(CENTER);
fill(0,0,64);
shape(svgbild, width/2, height/2, 800, 800);
fill(0,0,128);
shape(svgbild, width/2, height/2, 400, 400);
fill(0,0,192);
shape(svgbild, width/2, height/2, 200, 200);
fill(0,0,255);
shape(svgbild, width/2, height/2);
Oder in Abhängigket von Maus/Touch (Schaltfläche):
PShape svgbild;

void setup() {
  size(800,400);
  svgbild = loadShape("fade.svg");
}

void draw() {
  background(0);
  shapeMode(CENTER);

  shape(svgbild, width/2, height/2, 200, 200);
}

void mousePressed() {
  if (mouseX > width/2-100 && mouseX < width/2+100 &&
      mouseY > height/2-100 && mouseY < height/2+100) {
    svgbild.disableStyle();
  } else {
    svgbild.enableStyle();
  }
}
↑
(Pixel-)Bild und Maus
Am einfachsten: Bild an Mausposition zeichnen.
PImage bild;

void setup() {
  size(800,480);
  bild = loadImage("backlarge.png");
}

void draw() {
  background(0);
  imageMode(CENTER);
  image(bild, mouseX, mouseY);
}
Echtes Drag&Drop braucht Koordinaten für das Bild:
PImage bild;
float bildX;
float bildY;
float startX;
float startY;

void setup() {
  size(800,480);
  bild = loadImage("backlarge.png");
  bildX = width/2;
  bildY = height/2;
  startX = bildX;
  startY = bildY;
}

void draw() {
  background(0);
  imageMode(CENTER);
  image(bild, bildX, bildY);
}
Wenn die Maus gedrückt wird: den Abstand zwischen Maus und Bildposition merken.
void mousePressed() {
  startX = mouseX;
  startY = mouseY;
}
Wenn die Maus dann gezogen wird, verändert das die Bildposition (abhängig vom ursprünglichen Abstand zwischen Maus und Bild).
void mouseDragged() {
  bildX = mouseX + startX;
  bildY = mouseY + startY;
}
Optional: Die Koordinaten sperren, wenn das Bild an die Ränder stößt (siehe: constrain()).
void mouseDragged() {
  bildX = constrain(mouseX+startX, width/2-(bild.width-width)/2, width/2+(bild.width-width)/2);
  bildY = constrain(mouseY+startY, height/2-(bild.height-height)/2, height/2+(bild.height-height)/2);
}
↑
Diorama
Klasse für Layer (vorne, mitte, hinten) und verschieden große Bilder (für Parallax-Scrolling).
Steuerung mit der Tastatur (Java, siehe
keyPressed()) und dem Touchscreen (Android, siehe
mouseReleased()).
Quellcode: Android, Java
Bild als Ball
Ball mit Bild (Sprite): Bild darstellen statt zeichnen in display()
void display() {
  imageMode(CENTER);
  image(bild,x,y);
}
Und dazu: Bild laden und merken. Insgesamt:
class Ball {
  float x;
  float y;
  float vx;
  float vy;
  PImage bild;

  Ball() {
    x = width/2;
    y = height/2;
    vx = random(-1, 1);
    vy = random(-1, 1);
    bild = loadImage("name.png");
  }

  void display() {
    imageMode(CENTER);
    image(bild,x,y);
  }

  void update() {
    x = x+vx;
    y = y+vy;
    if (x<0) {
      vx = -vx;
      x = 0;
    }
    else if (x>width) {
      vx = -vx;
      x = width;
    }

    if (y<0) {
      vy = -vy;
      y = 0;
    }
    else if (y>height) {
      vy = -vy;
      y = height;
    }
  }
}
↑
Animation
Photoshop macht Layer zu Animationen (Make Frames from Layers)...


...und Animationen zu Bildsequenzen (Export/Render Video.../Bildsequenz).
Für jeden Frame ein Bild laden. Speichern und Darstellung übernimmt eine Klasse (Übersicht: Tabs!).
Animation a;
PImage bg;
void setup() {
size(800,480);
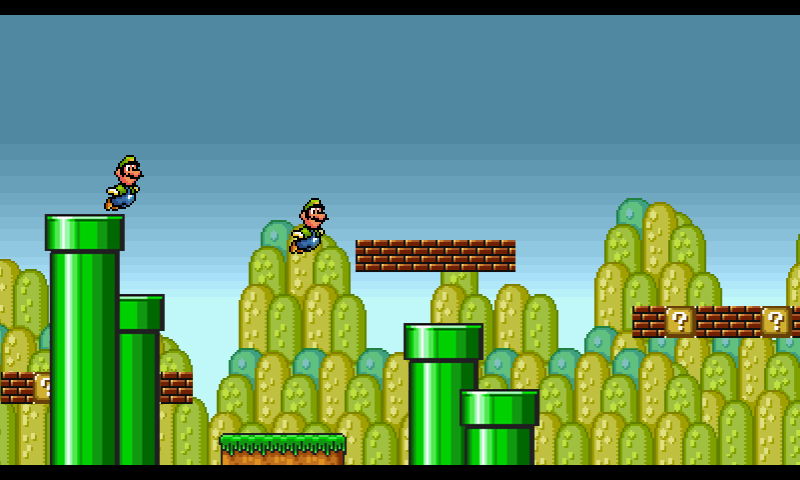
a = new Animation("luigi",35);
bg = loadImage("back.gif");
}
void draw() {
imageMode(CENTER);
image(bg,width/2,heigth/2);
a.display();
}
Dazu eine Klasse (zur Übersicht: im neuen Tab!) für Animationen (im Prinzip eine Kombination aus Mover/Ball und ArrayList für mehrere Bilder). Beachte, dass in der update()-Funktion nichts passiert (kein Verhalten/keine Interaktion).
class Animation {
  ArrayList<PImage> images;
  int currentImage;
  float x;
  float y;
  Animation(String name, int imageCount) {
    images = new ArrayList();
    for (int i=1; i<=imageCount; i++) {
      images.add(loadImage(name+nf(i, 2)+".png"));
    }
    x = width/2;
    y = height/2;
  }
  void display() {
    imageMode(CENTER);
    image(images.get(currentImage), x, y);
    currentImage++;
    if (currentImage==images.size()) currentImage = 0;
  }
  void update() {
    // hier passiert nichts
  }
}
dazu: Animation-data.zip
↑Interaktion und Animation
Die update()-Funktion der Animation bekommt Verhalten (wieder wie Mover/Ball): sie reagiert auf die Maus (siehe auch: Abstand messen mit dist()).
class InteractiveAnimation {
  ArrayList<PImage> images;
  int currentImage;
  float x;
  float y;
  InteractiveAnimation(String name, int imageCount) {
    images = new ArrayList();
    for (int i=1; i<=imageCount; i++) {
      images.add(loadImage(name+nf(i, 2)+".png"));
    }
    x = width/2;
    y = height/2;
  }
  void display() {
    imageMode(CENTER);
    image(images.get(currentImage), x, y);
    currentImage++;
    if (currentImage==images.size()) currentImage = 0;
  }
  void update() {
    if (dist(mouseX, mouseY, x, y) < 50) {
      x = x + random(-2, 2);
      y = y + random(-2, 2);
    }
  }
}
Beim Erzeugen der Animation (new...) den Namen der Dateien angeben - bis hin zur Zahl (also "luigi" für "luigi01.png" bis "luigi35.png"). Dahinter dann die Anzahl (hier: 35). Das Laden aller Bilder erfolgt dann automatisch (dank for-Schleife).
InteractiveAnimation ia;
PImage bg;

void setup() {
  size(800,480);
  ia = new InteractiveAnimation("luigi",35);
  bg = loadImage("back.gif");
}

void draw() {
  imageMode(CENTER);
  image(bg,width/2,height/2);
  ia.update();
  ia.display();
}
↑
Moorhuhn-Mario
Diorama plus Klassen für ein Mario/Luigi-Moorhuhn und für eine Menge davon (inkl. Erzeugen/Löschen).
 ↑
↑